
Deploying R, RStudio and Shiny applications on Unbuntu Server
In this post, we are going to see how to deploy R, RStudio, and Shiny apps on a virtual server.
The post won’t focus on Shiny programming aspect, neither on Unbuntu programming, however, the tutorial is self-sufficient. Only by following the different steps, you’ll get a working server and Shiny app.
1. Choosing your virtual server provider
There are a lot of virtual server providers available on the web, among them:
- Microsoft Azure
- AWS
- IBM softlayer
- DigitalOcean
The offers are more or less the sames, for this tutorial, you are going to need a virtual server with at least 2GB of RAM and Unbuntu installed. Below is a comparison of these service providers (Since it’s far from being exhaustive, tell me if you know better options).
| Service provider | Specifications | Monthly price |
| AWS (t2.small) | 2GB RAM/1 CPU/AWS storage | 16,06$ |
| DigitalOcean | 2GB RAM/2 CPU/40 GB SSD | 20$ |
| Microsoft Azure (A1) | 1.75 GB RAM/1 CPU/40 GB disk | 20.09$ |
| IBM SoftLayer | 2GB RAM/1 CPU/ 25GB disk | 35$ |
In this tutorial we will use DigitalOcean (Still most of the tutorial should be working on most other Unbuntu server), you can get a 10$ discount using this link, which is enough to run the server for 2 weeks for free.
Choosing DigitalOCean was mainly motivated by its low cost, the easy configuration and the great amount of tutorials available to deploy a DigitalOcean server. If you already have an other service provider, the tutorial should work fine too.
2. Setting up the Unbuntu droplet
On digital ocean, server are call droplet, first you need to complete your account creation, then let’s create an Unbuntu droplet:
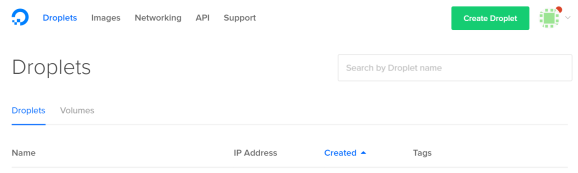
- Click on the droplet button:
- Select Unbuntu 16.04 as the OS and a 2GB virtual server

- Select your hosting location (The closer, the better)

- Create a new SSH key (if you need help to create and enter the SSH key, DigitalOcean made a tutorial here for windows and here for Mac/Linux)
- Create your droplet

Great, you now have your own Ubuntu server !
3.a. Connection to the server
Now, we need to connect to our server, you can do it by following step five of the SSH creation tutorial: here for windows and here for Mac/Linux.
Once this step has been completed, you should see the Linux terminal.
3.b.Creation of an admin user
You may want to create a new admin user, to avoid working with the root privilege:
$ adduser user_name
Now we need to grant this user sudo (admin) privileges:
$ usermod -a -G sudo user_name
You then will be asked to enter a password and some information (name, room number, …)
And we can now modify our SSH connection to login with this user account:
- Windows and putty:
Connection->Data->Autologin username (change it from root to the user_name you entered)
4. Installing R and Shiny
To install R, you just have to follow this tutorial from DigitalOcean: Tutorial R base .
A few comments:
- The R version should the most recent one (3.3.2), you can check it using version in R.
- Don’t forget to run R with: (thus the package will be available for all users).
$ sudo -i R
Once you run R with the previous command, R terminal should start, you can quit R by using q(). You can now install the shiny package in the R console with:
install.packages("shiny")
And you can check the installation by trying to load the library and one of its function:
>library("shiny")
>fluidPage()
5. Installing R Studio server:
Now let’s install RStudio to have a complete R environnement. Futhermore having RStudio on your server will allow you to code there directly and to avoid some problems when transitioning from your laptop to the server.
You’ll just have to run the following command (from Rstudio):
$ sudo apt install gdebi-core
$ wget https://download2.rstudio.org/rstudio-server-1.0.44-amd64.deb
$ sudo gdebi rstudio-server-1.0.44-amd64.deb
Now, you should be ale to access Rstudio server your internet browser at the following:
http://YOUR_DROPLET_IP:8787/
You’ll now access the login screen, you can login using the user/password combinaison created at step 3.b.

IMPORTANT COMMENT: if you want a package/ressource to be available to all users, install it through the RConsole and not Rstudio !
6.Installing Shiny server
Now, we just have to install and deploy Shiny server:
$ wget https://download3.rstudio.org/ubuntu-12.04/x86_64/shiny-server-1.5.1.834-amd64.deb
$ sudo gdebi shiny-server-1.5.1.834-amd64.deb
Your Shiny server is now available on:
http://YOUR_DROPLET_IP:3838/
You should now see (the error you get is normal since Rmarkdown is not installed):

7.Developing and deploying your app:
Our goal is to deploy the following app from Rstudio showing the wordcloud of different novel.
We’ll see three different ways to deploy the app:
- From your computer
- From Rstudio server
- Directly from github
First we need to prepare our server for the app. The app require three packages:
- tm
- memoise
- wordcloud
You can install them using:
$ sudo -i R
Then in the RConsole
>install.packages(c("tm","memoise","wordcloud"))
a.Deployment from your computer
- Download the git from here.
- Connect to Rstudio server
- Upload the zip (shiny-examples-master.zip) using the upload button- right bottom window
- The file should be unziped automatically. The word-cloud app is in shiny-examples-master/082-word-cloud
- Now we want to move our app to the server location:
$ cd /
$  sudo mv /home/antoine/shiny-examples-master/082-word-cloud /srv/shiny-server/
The first command bring us back to root while the second one move the files.
6. Access the app at:
http://YOUR_DROPLET_IP:3838/082-word-cloud/
b. Deployment from Rstudio
- Install git using the Unbuntu console:
$ sudo apt-get install git-core
2. Connect to Rstudio server
3. New Project->Version Control->Git: enter https://github.com/rstudio/shiny-examples.git as repository URL.
4.Move the app to the server:
$ cd /
$  sudo mv /home/antoine/shiny-examples/082-word-cloud /srv/shiny-server/
6. Access the app at:
http://YOUR_DROPLET_IP:3838/082-word-cloud/
c. Deployment from R console
- Install devtools using the following (very-short) tutorial .
- Run R:
$ sudo -i R
- Run the following code in R (We are just asking R to clone the git-repository with all the Shiny examples):
git2r::clone("https://github.com/rstudio/shiny-examples.git", "/srv/shiny-server/Rmethod")
4.Access all the apps (including the word cloud one) at:
http://YOUR_DROPLET_IP:3838/Rmethod/
That’s it ! You managed to deploy a Shiny app on a virtual server !
You can now easily deploy your own app, whether using a git-repository or by developing it directly in RStudio server.
