
How to Run A Shiny App in the Cloud Using Tutum, Digital Ocean and Docker Containers
Want to share your content on R-bloggers? click here if you have a blog, or here if you don't.
Via RBloggers, I spotted this post on Deploying Your Very Own Shiny Server. I’ve been toying with the idea of running some of my own Shiny apps, so that post provided a useful prompt, though way too involved for me;-)
So here’s what seems to me to be an easier, rather more pointy-clicky, wiring stuff together way using Docker containers (though it might not seem that much easier to you the first time through!). The recipe includes: github, Dockerhub, Tutum and Digital Ocean.
To being with, I created a minimal shiny app to allow the user to select a CSV file, upload it to the app and display it. The ui.R and server.R files, along with whatever else you need, should be placed into an application directory, for example shiny_demo within a project directory, which I’m confusingly also calling shiny_demo (I should have called it something else to make it a bit clearer – for example, shiny_demo_project.)
The shiny server comes from a prebuilt docker container on dockerhub – rocker/shiny.
This shiny server can run several Shiny applications, though I only want to run one: shiny_demo.
I’m going to put my application into it’s own container. This container will use the rocker/shiny container as a base, and simply copy my application folder into the shiny server folder from which applications are served. My Dockerfile is really simple and contains just two lines – it looks like this and goes into a file called Dockerfile in the project directory:
FROM rocker/shiny
ADD shiny_demo /srv/shiny-server/shiny_demo
The ADD command simply copies the the contents of the child directory into a similarly named directory in the container’s /srv/shiny-server/ directory. You could add as many applications you wanted to the server as long as each is in it’s own directory. For example, if I have several applications:

I can add the second application to my container using:
ADD shiny_other_demo /srv/shiny-server/shiny_other_demo
The next thing I need to do is check-in my shiny_demo project into Github. (I don’t have a how to on this, unfortunately…) In fact, I’ve checked my project in as part of another repository (docker-containers).

The next step is to build a container image on DockerHub. If I create an account and log in to DockerHub, I can link my Github account to it.
I can then create an Automated Build that will build a container image from my Github repository. First, identify the repository on my linked Github account and name the image:

Then add the path the project directory that contains the Dockerfile for the image you’re interested in:

Click on Trigger to build the image the first time. In the future, every time I update that folder in the repository, the container image will be rebuilt to include the updates.
So now I have a Docker container image on Dockerhub that contains the Shiny server from the rocker/shiny image and a copy of my shiny application files.
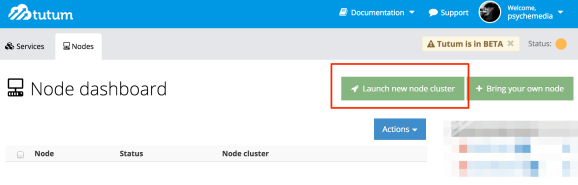
Now I need to go Tutum (also part of the Docker empire), which is an application for launching containers on a range of cloud services. If you link your Digital Ocean account to tutum, you can use tutum to launch docker containers on Dockerhub on a Digital Ocean droplet.
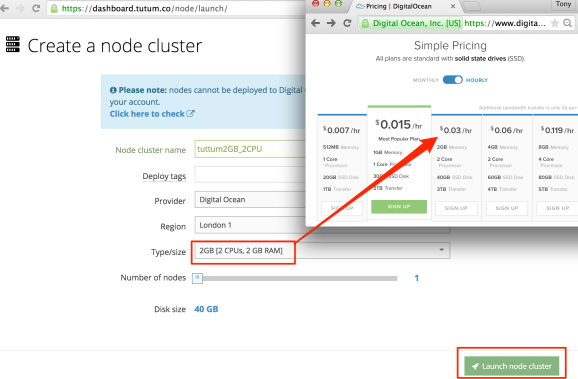
Within tutum, you’ll need to create a new node cluster on Digital Ocean:
(Notwithstanding the below, I generally go for a single 4GB node…)
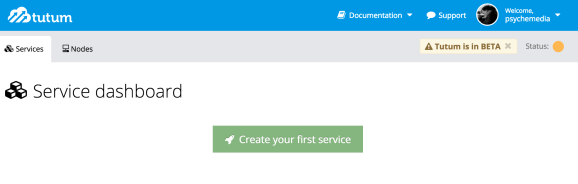
Now we need to create a service from a container image:
I can find the container image I want to deploy on the cluster that I previously built on Dockerhub:

Select the image and then configure it – you may want to rename it, for example. One thing you definitely need to do though is tick to publish the port – this will make the shiny server port visible on the web.

Create and deploy the service. When the container is built, and has started running, you’ll be told where you can find it.

Note that if you click on the link to the running container, the default URL starts with tcp:// which you’ll need to change to http://. The port will be dynamically allocated unless you specified a particular port mapping on the service creation page.
To view your shiny app, simply add the name of the folder the application is in to the URL.
When you’ve finished running the app, you may want to shut the container down – and more importantly perhaps, switch the Digital Ocean droplet off so you don’t continue paying for it!

As I said at the start, the first time round seems quite complicated. After all, you need to:
- create a Github account
- create a Dockerhub account
- link your Github account to your Docker account
- create a Digital Ocean account [affiliate link: sign up to Digital Ocean and get $10 credit, and they’ll tip me some credit too…]
- create a tutum account
- link your Digital Ocean account to your tutum account
(Actually, you can miss out the dockerhub steps, and instead link your github account to your tutum account and do the automated build from the github files within tutum: Tutum automatic image builds from GitHub repositories. The service can then be launched by finding the container image in your tutum repository)
However, once you do have your project files in github, you can then easily update them and easily launch them on Digital Ocean. In fact, you can make it even easier by adding a deploy to tutum button to a project README.md file in Github.
See also: How to run RStudio on Digital Ocean via Tutum and How to run OpenRefine on Digital Ocean via Tutum.
PS to test the container locally, I launch a docker terminal from Kitematic, cd into the project folder, and run something like:
docker build -t psychemedia/shinydemo .
docker run --name shinydemo -i -t psychemedia/shinydemo
I can then set the port map and find a link to the server from within Kitematic.

R-bloggers.com offers daily e-mail updates about R news and tutorials about learning R and many other topics. Click here if you're looking to post or find an R/data-science job.
Want to share your content on R-bloggers? click here if you have a blog, or here if you don't.